Routes
About Routes 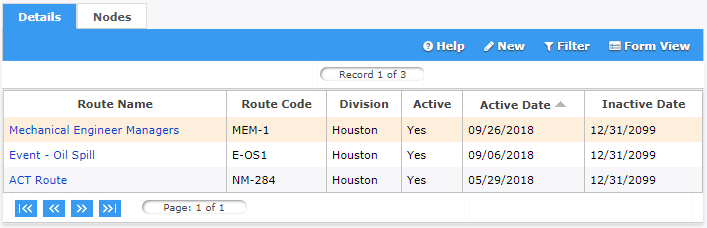
Routes are pre-defined lists of approvers and their order (series or parallel) that can be added to an MOC. Originators can select from routes available in their division when adding approvers to an MOC which currently does not have any approvers. This is a legacy feature that is optional when adding approvers to events, it is possible to also pre-define approvers for certain event forms. MOC Users and MOC Power User's at the division level are able to view, create, and edit routes using the Settings > Routes section.
Each route has nodes. Nodes are the approvers that makeup the route and can be individuals or jobs. If a node is a job, any person holding that job can approve the event before it goes to the next node. Each node has an order that indicates how the event will move from node (person or job) to node for approval. The node order can be sequential (1,2,3,4), parallel (1,1,1,1) or a combination (1,1,1,2,3,3). All nodes in parallel get the event on their Frontline desktop simultaneously and must approve the event before it goes to the next node.
Note: A route cannot be deleted if it is being used by an event or if there are nodes associated to the route. It is recommended to inactivate routes that should no longer be available for users to select.
Manage Routes
The instructions below provide detailed steps on how to create, update and delete / inactivate ref codes. Remember, only user's with MOC Power User permission can create, update or delete / inactivate routes.
How to Create a Route
Follow the steps provided below to create a new route for a division.
|
Step |
Action |
|
1 |
Navigate to Settings > Routes in the MOC module menu. Result: The routes already available in the system will display. Note: The ability to view routes in divisions outside of a users default division is determined by organization permissions. |
|
2 |
Select Result: The Route Information form will display all available fields to complete. |
|
3 |
Enter the name of the route in the Route Name field. Example: Engineering Managers, HR Administrators |
|
4 |
Route Code is an optional field that can be used to further identify the route. Enter a route code, if necessary. |
|
5 |
Description is an optional field that can be used to further describe the route. Enter a description, if necessary. |
|
6 |
Ensure Company, and Division are correct. Note: Routes are created and saved at the division level. |
|
7 |
Ensure Active is checked, making the new route available for use once completed. |
|
8 |
Modify the Active and Inactive dates, if necessary. Result: Effective the active date the route will be available to for users to select. Effective the inactive date the route will be unavailable for users to select. |
|
9 |
Select Result: The new route has been added to the list and is available for users to select. |
 from the toolbar.
 on the toolbar.
How to Update a Route
Follow the steps provided below to update an existing route for a division.
|
Step |
Action |
|
1 |
Navigate to Settings > Routes in the MOC module menu. Result: The routes already available in the system will display. Note: The ability to view routes in divisions outside of a users default division is determined by organization permissions. |
|
2 |
Select the Route that needs to be updated. Result: The Route Information form will display all the available fields to modify. |
|
3 |
Modify the fields that need to be changed. |
|
4 |
Select Result: The route will be updated with the modifications that were made. |
 on the toolbar to update the route with the modifications
that were made on the
on the toolbar to update the route with the modifications
that were made on the
How to Delete or Inactivate a Route
Follow the steps provided below to delete or inactivate route. Remember, a route cannot be deleted if it is being used by an event or if there are nodes associated to the route. It is recommended to inactivate routes that should no longer be available for users to select.
|
Step |
Action |
|
1 |
Navigate to Settings > Routes in the MOC module menu. Result: The routes already available in the system will display. Note: The ability to view routes in divisions outside of a users default division is determined by organization permissions. |
|
2 |
Select the Route that needs to be updated. Result: The Route Information form will display all the available fields to modify. |
|
3 |
If the route has not been used in an event, it is possible to delete the route. To delete
a ref code, select Result: The route has been deleted from the list of available routes for the division. |
|
4 |
If the route has been used in an event, the route can be inactivated to remove it from the list of available routes for users to select. To
inactivate a route, uncheck
Active from the Route
Information form. Then select Result: The route will not be visible in the category drop down list for users to select when adding approvers events. Note: All events created with the route before the inactive status will retain the route. |
 on the toolbar.
Then select
on the toolbar.
Then select  when asked "Are
you sure you want to delete?" from the pop up message.
when asked "Are
you sure you want to delete?" from the pop up message.